Building a Display, Part 2: Wire

Last time we looked at some basic types of toy displays. Today, we're going to focus a little more on a specific detail: wire.
Why use wire? Well, for one thing it helps figures stand up. In addition, it opens the door for a variety of display options that would be otherwise unavailable. I happen to be a believer that Superman should be flying: wire makes this possible.
Now, there are many different kinds of wire. I use simple floral wire, because it's cheap and easy to find. If you want to hunt down something more attractive, go ahead: I'm too lazy.
Also, I shouldn't need to say this, but I'm going to anyway. Wire is metal, so you using it could leave a mark. Personally, I've lost a lot more paint from figures falling off shelves because they didn't have wire than I have from wire itself. But, if leaving your playthings in pristine condition is a priority, this isn't going to help.
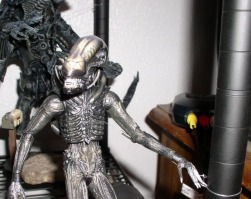
Lets take a look at a couple examples. We'll start by taking a look at The Alien, created by NECA. It's a good looking toy, but mine has some articulation issues. When I first pulled it out of the package, two of its joints snapped immediately. Rather than take it back to the store (like I probably should have), I asked my wife to glue him back together. She got him looking right, but that doesn't fix the problems with his joints, so I have limited options on how far I can adjust him.
|
As a result, he doesn't stand up too well on his own. The solution, of course, is wire. |
 |
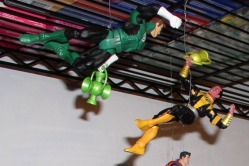 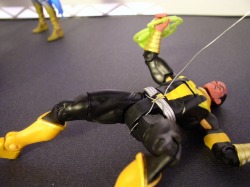 |
Lets turn our attention back to Green Lantern and his nemesis, Sinestro. Rather than display them on the already crowded ground, I decided to hoist them in the air. |
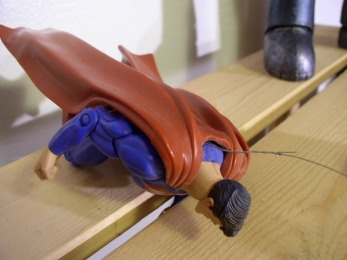
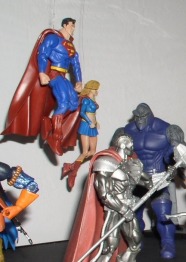
Superman was a little easier. I ran the wire around the center peg which attaches his cape to his body. Then it was just a matter of wrapping it around the pegs above. I used the same basic technique on Supergirl.
 |
 |
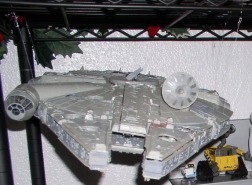
That's all fine and good, you might be saying, but how about larger toys. Well, it doesn't get much larger than this Millennium Falcon model (or it doesn't in my collection: I have a small apartment!). I used a couple lengths of wire for this, crossing for an 'x' pattern. One of the advantages wire has over string (beside being sturdier) is that it's malleable. I formed the 'x" into the shape I wanted and set the Falcon down.
|
Then began the adjustments. Oh, you didn't think it was that easy, did you? I raised, lowered, and shifted each wire until I had the angle and the height I wanted. When I was done, the Millennium Falcon was soaring over the other toys on my SF shelf. |
 |
Until then, I keep a blog on all things geek. Check it out if you've got some time to spare.
