Building a Display: Arts and Crafts: Making a Playset
A long time ago, I started a series about setting up toy displays. If you're interested, you can find those on the Articles page, along with several other columns and other assorted information.
This is sort of a continuation of that, though it's going to deviate a bit. Today, I want to consider the "playset", a classic component of toy collection and play. Of course, it's not too difficult to find conventional playsets on Ebay for reasonable prices. But my situation was a little more complicated.
If you've been reading recently, I've been picking up a lot of Super Hero Squad figures, as well as some of the related lines. Yes, even after sitting through a few episodes of the abysmal new show, the toys are as awesome as ever. Anyway, I've got so many of these, I ran out of space to display them. The only real area I've got is a tiny area on a shelf in my living room.
If only there was someway to install a tiered structure, so I could display different characters on different levels....
Sure, I could have bought something, but I know from experience it's hard to find lightweight shelving cheap. As for a traditional playset; they're usually too full of action features and extras to be much use for display.
No, I'd need something small, empty, and simple. And, seeing as I was between employment in the worst economy in decades, I needed to build it myself.
Then I remembered I already had.
Last winter, I'd been playing a lot of Dungeons & Dragons, and I became intrigued by the idea of layered grid-boards to create a three-dimensional environment. Along with some other things, I turned an old, upside-down wine rack into something that could be used as a tower.
|
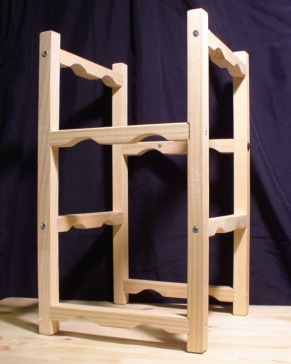
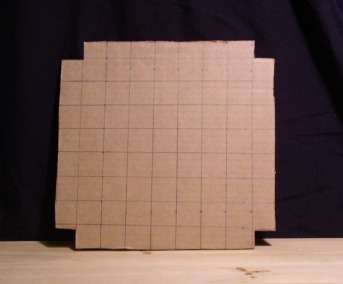
I hadn't used it for a while, and it was taking up space elsewhere. So I decided to convert it into a kind of play/display set. First, lets take a look at the wine rack. If I'm remembering right, my wife and I bought this four or five years back at an Ikea. I don't remember for sure, but I think we paid something between three and five dollars for it. Well, it turned out we didn't drink - or collect - as much wine as we'd expected. But, as a structure, it had some real promise: all it really needed were some floors and a ceiling, and it would make become a hollow building, which is really all a playset needs to be. Originally, I cut out cardboard pieces to fit over the parallel pieces. All I did was trace around the pillars then use a straightedge for the outside lines. Of course, because I was originally using it for gaming, I drew a grid on the back of each level. |
 |
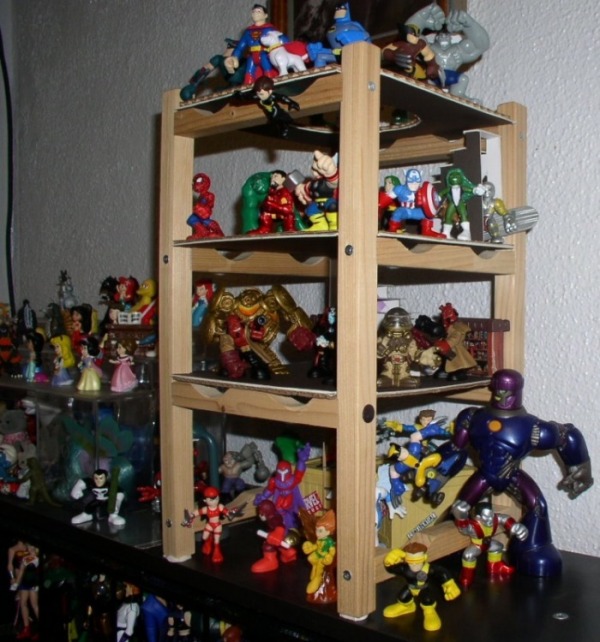
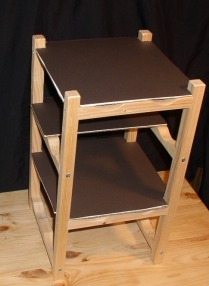
I could have made each level the same size, but this would have made accessing the miniatures ( and later toys) difficult. Instead, I made one level half size, so I could get to the figures on and below with ease. Besides, I liked the balcony effect that created.
 |
Once the floors were done, I slid them in place. To this day, I've never glued anything to the original wine rack, so all levels are interchangeable. In fact, if I ever need it, I can still get the wine rack back. Converting this into a playset was even easier, because I'd already done the hard work. I used some card stock, also left over from the earlier project (more on that later). I'd picked up a pack of this at an art supply store for five or six bucks. I pulled out the utility blade and cut the card stock in the same shapes as the cardboard pieces. I'd planned on just using the card stock as the floors, but it turned out not being solid enough. Instead, I glued it to the back of the original cardboard grids. Now they're reversible: put them down one way, and you've got a nice looking floor. Turn them over, and you've got a grid. |
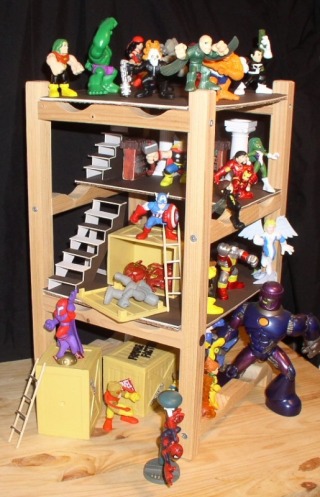
The end result made me pretty happy. I dropped the toys in place, and began to play... I mean, arrange my collectibles in preparation for display. Only... something was missing. the setup just seemed... empty.
|
Remember when I said we'd get back to that card stock? The original reason I bought it was to build some stairs, doors, and other objects. Again, this was intended for gaming, but miniature objects are miniature objects. I'm particularly proud of the stairs. These were relatively easy to make: you just measure out the side pieces, cut with an utility blade, then make the steps. A few quick tips, though: first of all, if you play your card stock right, you can use the same zig-zag cut for both sides of the stairs. Next, just like with real stairs, you want a lip extending over the edge. This is going to look and work better. Plus, it'll make it easier to pose miniatures halfway up. Also, make sure you brace the stairs between the sides. I've had luck with just a single piece of thin cardboard. This is going to help you maintain structure and stability. |
 |
There's a picture below of one of the staircases: it's not exactly professional work, but I think it turned out okay.
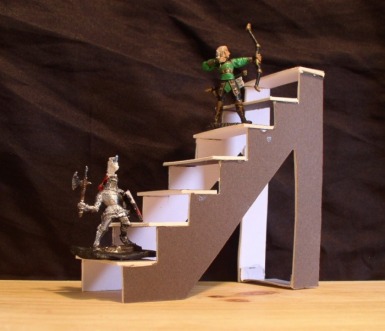 |
The ladders, visible in the topmost picture, were made from cut skewers and thin strips of the same card stock I used on the stairs. Once again, these were originally intended as gaming accessories.
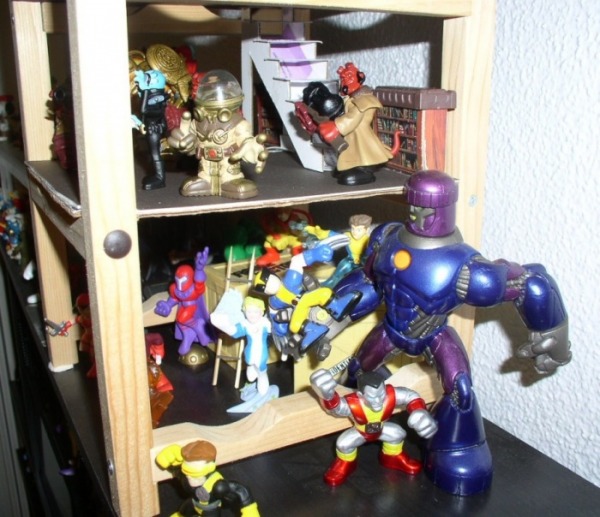
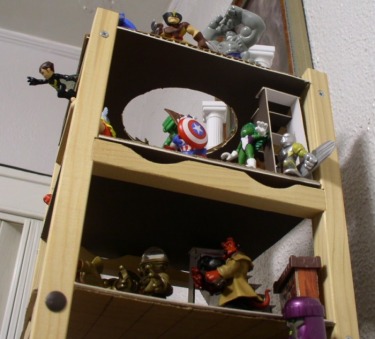
Unless you're new here, you know I make a point of stockpiling accessories and display pieces. I regularly swing by places that have no discernible relationship to toy collecting to look for deals on unusual objects that can be appropriated for geekier purposes. For my final display, I ransacked my collection. In addition to the figures, ladders, and the stairs, there are crates I got along with Marvel's "Figure Factory" toys, there are miniature libraries from the Hero Quest game I got in the early 90's (good times), and, in some of the pictures, you might recognize the Wilton Cake Pillars I reviewed a while back. The road some of the figures are standing on below came as part of a display case for cars. I've said it before: you can find great accessories and display pieces anywhere. |
So that's it. The display is built, the figures are in place, I'm done. Only... I don't know. The ceiling is leaving the upper floor too dark. What this needs is a sunlight.
|
Well, it turns out I had some cardboard pieces with holes in the center - I think they came with dishes - and a little more card stock. I traced and cut out the hole and glued them together. Of course, if I was REALLY serious about this, I'd have painted the wine rack. But I'm happy enough the way it is. All right. At this point, you might be thinking to yourself: "Wow, I should run out and buy supplies to make one of my own!" Or, more likely, you're thinking, "Wow. That was pointless." But, believe it or not, there is a point. And it's not to provide instructions on building your own wine rack Super Hero Squad display case. Of course, if you are a collector of Super Hero Squad figures and this is exactly what your apartment needs, then I'm thrilled this might help. If someone wants to duplicate this or improve upon it - as I'm sure any of you could easily do - that's awesome. |
 |
But I didn't choose the wine rack because it was perfect: I chose it because I had it lying around. In fact, none of this was bought to display these toys.
Times are tough for a lot of us. Obviously not so tough I can't afford to keep buying toys now and then, but I'm certainly not in a situation where I want to spend thirty to fifty bucks on some sort of display set for these figures.
And that's the point of all this: if you're looking for a display for your collectibles, there's a lot of room for improvisation. Maybe you've got a sturdy, multi-leveled shoe rack you haven't used in years. Or maybe there's a spice rack you picked up at a yard sale last summer, but never bought any spice for. Or, if you've got a cheap Ikea wine rack, that might work, too.
Because, when times are tough, you don't want to throw away good money on unnecessary shelving solutions. You want to save that money for toys.
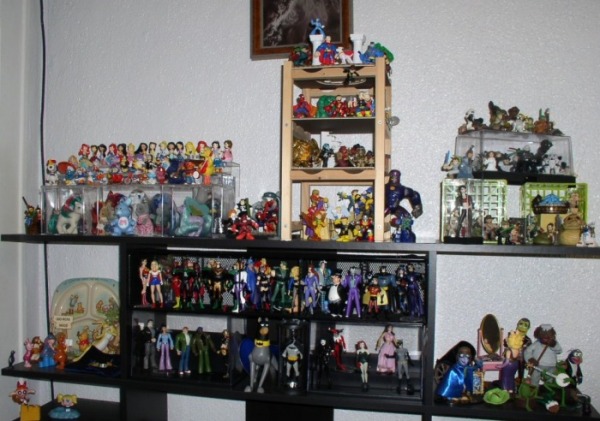
I'm tossing in some additional photos of the playset below. See you next time!